mirror of
https://github.com/QYG2297248353/appstore-1panel.git
synced 2024-11-11 09:56:56 +08:00
177 lines
6.5 KiB
Markdown
177 lines
6.5 KiB
Markdown
# ddns-go
|
||
|
||
自动获得你的公网 IPv4 或 IPv6 地址,并解析到对应的域名服务。
|
||
|
||
## 特性
|
||
|
||
- 支持Mac、Windows、Linux系统,支持ARM、x86架构
|
||
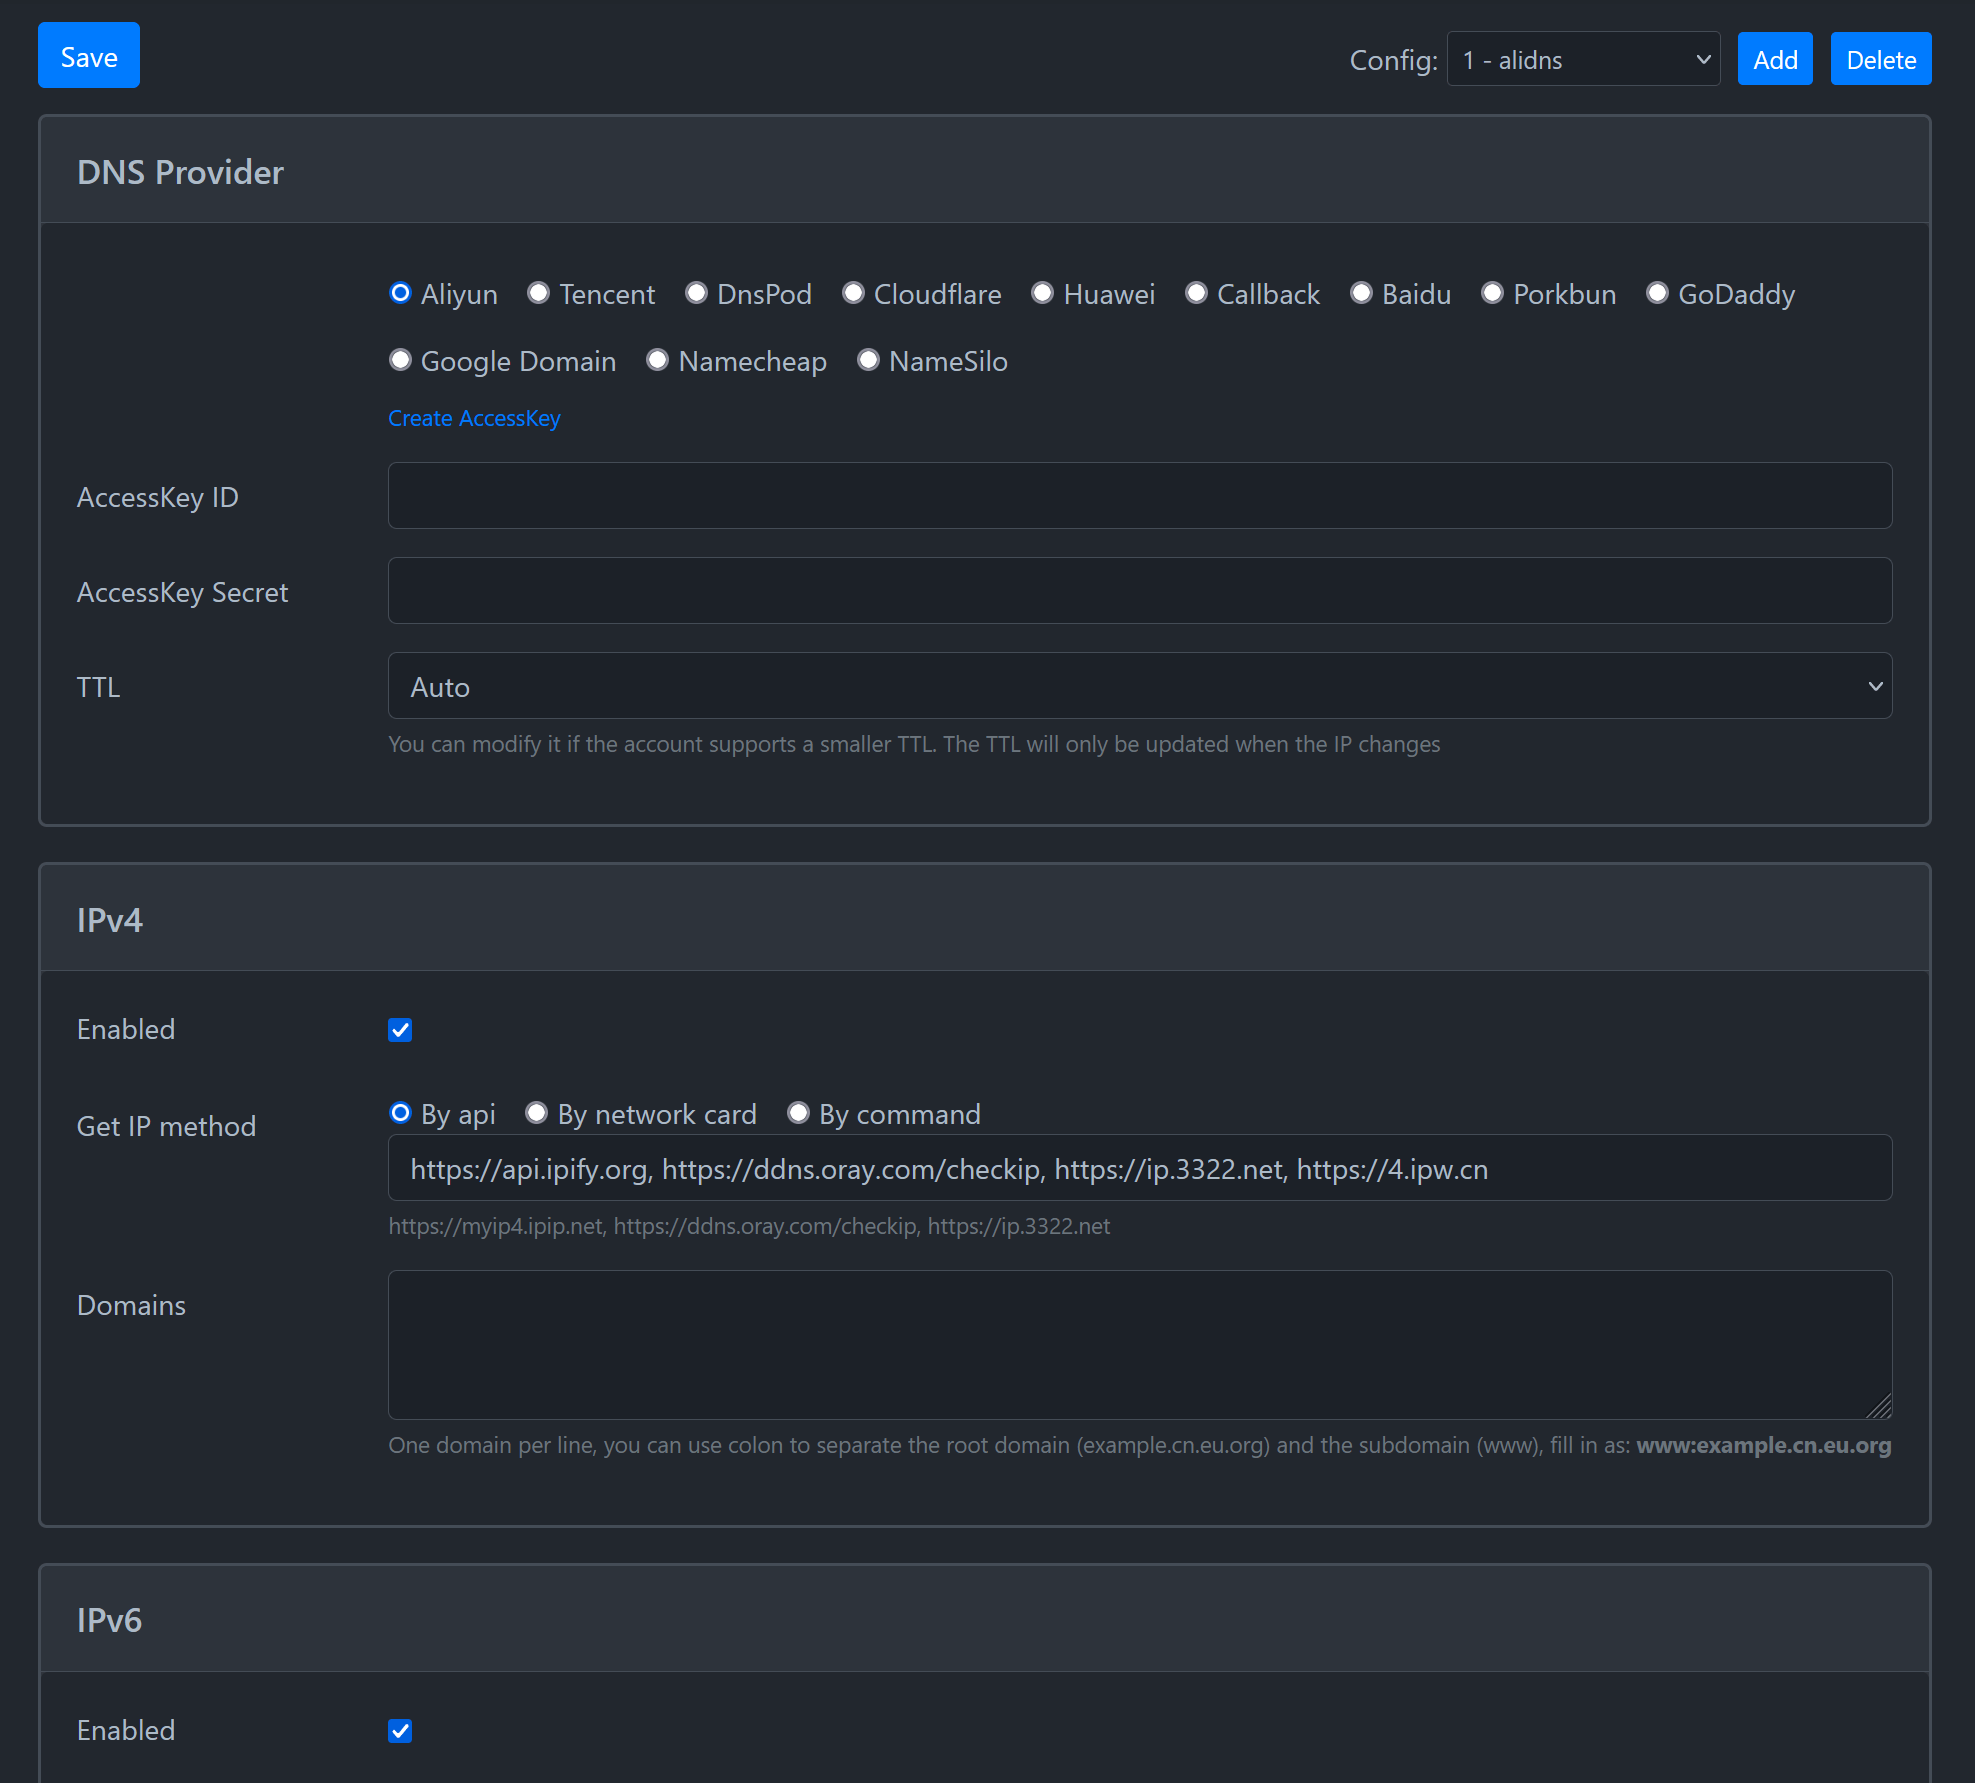
- 支持的域名服务商 `Alidns(阿里云)` `Dnspod(腾讯云)` `Cloudflare` `华为云` `Callback` `百度云` `Porkbun` `GoDaddy` `Google Domain`
|
||
- 支持接口/网卡/[命令](https://github.com/jeessy2/ddns-go/wiki/通过命令获取IP参考)获取IP
|
||
- 支持以服务的方式运行
|
||
- 默认间隔5分钟同步一次
|
||
- 支持同时配置多个DNS服务商
|
||
- 支持多个域名同时解析
|
||
- 支持多级域名
|
||
- 网页中配置,简单又方便,默认勾选`禁止从公网访问`
|
||
- 网页中方便快速查看最近50条日志
|
||
- 支持Webhook通知
|
||
- 支持TTL
|
||
- 支持部分DNS服务商[传递自定义参数](https://github.com/jeessy2/ddns-go/wiki/传递自定义参数),实现地域解析等功能
|
||
|
||
> **Note** 建议在启用公网访问时,使用 Nginx 等反向代理软件启用 HTTPS 访问,以保证安全性。[FAQ](https://github.com/jeessy2/ddns-go/wiki/FAQ)
|
||
|
||
## 使用IPv6
|
||
|
||
- 前提:你的电脑或终端能正常获取IPv6,并能正常访问IPv6
|
||
- Windows/Mac:推荐 [系统中使用](#系统中使用),Windows/Mac桌面版的docker不支持`--net=host`
|
||
- 群晖:
|
||
- 套件中心下载docker并打开
|
||
- 注册表中搜索`ddns-go`并下载
|
||
- 映像 -> 选择`jeessy/ddns-go` -> 启动 -> 高级设置 -> 网络中勾选`使用与 Docker Host 相同的网络`,高级设置中勾选`启动自动重新启动`
|
||
- 在浏览器中打开`http://群晖IP:9876`,修改你的配置,成功
|
||
- Linux的x86或arm架构,推荐使用Docker的`--net=host`模式。参考 [Docker中使用](#Docker中使用)
|
||
- 虚拟机中使用有可能正常获取IPv6,但不能正常访问IPv6
|
||
|
||
## Webhook
|
||
|
||
- 支持webhook, 域名更新成功或不成功时, 会回调填写的URL
|
||
- 支持的变量
|
||
|
||
| 变量名 | 说明 |
|
||
| ---- | ---- |
|
||
| #{ipv4Addr} | 新的IPv4地址 |
|
||
| #{ipv4Result} | IPv4地址更新结果: `未改变` `失败` `成功`|
|
||
| #{ipv4Domains} | IPv4的域名,多个以`,`分割 |
|
||
| #{ipv6Addr} | 新的IPv6地址 |
|
||
| #{ipv6Result} | IPv6地址更新结果: `未改变` `失败` `成功`|
|
||
| #{ipv6Domains} | IPv6的域名,多个以`,`分割 |
|
||
|
||
- 如 RequestBody 为空则为 GET 请求,否则为 POST 请求
|
||
- <details><summary>Server酱</summary>
|
||
|
||
```
|
||
https://sctapi.ftqq.com/[SendKey].send?title=你的公网IP变了&desp=主人IPv4变了#{ipv4Addr},域名更新结果:#{ipv4Result}
|
||
```
|
||
- <details><summary>Bark</summary>
|
||
|
||
```
|
||
https://api.day.app/[YOUR_KEY]/主人IPv4变了#{ipv4Addr},域名更新结果:#{ipv4Result}
|
||
```
|
||
</details>
|
||
- <details><summary>钉钉</summary>
|
||
|
||
- 钉钉电脑端 -> 群设置 -> 智能群助手 -> 添加机器人 -> 自定义
|
||
- 只勾选 `自定义关键词`, 输入的关键字必须包含在RequestBody的content中, 如:`你的公网IP变了`
|
||
- URL中输入钉钉给你的 `Webhook地址`
|
||
- RequestBody中输入
|
||
```json
|
||
{
|
||
"msgtype": "markdown",
|
||
"markdown": {
|
||
"title": "你的公网IP变了",
|
||
"text": "#### 你的公网IP变了 \n - IPv4地址:#{ipv4Addr} \n - 域名更新结果:#{ipv4Result} \n"
|
||
}
|
||
}
|
||
```
|
||
</details>
|
||
- <details><summary>飞书</summary>
|
||
|
||
- 飞书电脑端 -> 群设置 -> 添加机器人 -> 自定义机器人
|
||
- 安全设置只勾选 `自定义关键词`, 输入的关键字必须包含在RequestBody的content中, 如:`你的公网IP变了`
|
||
- URL中输入飞书给你的 `Webhook地址`
|
||
- RequestBody中输入
|
||
```json
|
||
{
|
||
"msg_type": "post",
|
||
"content": {
|
||
"post": {
|
||
"zh_cn": {
|
||
"title": "你的公网IP变了",
|
||
"content": [
|
||
[
|
||
{
|
||
"tag": "text",
|
||
"text": "IPv4地址:#{ipv4Addr}"
|
||
}
|
||
],
|
||
[
|
||
{
|
||
"tag": "text",
|
||
"text": "域名更新结果:#{ipv4Result}"
|
||
}
|
||
]
|
||
]
|
||
}
|
||
}
|
||
}
|
||
}
|
||
```
|
||
</details>
|
||
- <details><summary>Telegram</summary>
|
||
|
||
[ddns-telegram-bot](https://github.com/WingLim/ddns-telegram-bot)
|
||
</details>
|
||
- <details><summary>plusplus 推送加</summary>
|
||
|
||
- [获取token](https://www.pushplus.plus/push1.html)
|
||
- URL中输入 `https://www.pushplus.plus/send`
|
||
- RequestBody中输入
|
||
```json
|
||
{
|
||
"token": "your token",
|
||
"title": "你的公网IP变了",
|
||
"content": "你的公网IP变了 \n - IPv4地址:#{ipv4Addr} \n - 域名更新结果:#{ipv4Result} \n"
|
||
}
|
||
```
|
||
</details>
|
||
- <details><summary>Discord</summary>
|
||
|
||
- Discord任意客户端 -> 伺服器 -> 频道设置 -> 整合 -> 查看Webhook -> 新Webhook -> 复制Webhook网址
|
||
- URL中输入Discord复制的 `Webhook网址`
|
||
- RequestBody中输入
|
||
```json
|
||
{
|
||
"content": "域名 #{ipv4Domains} 动态解析 #{ipv4Result}.",
|
||
"embeds": [
|
||
{
|
||
"description": "#{ipv4Domains} 的动态解析 #{ipv4Result}, IP: #{ipv4Addr}",
|
||
"color": 15258703,
|
||
"author": {
|
||
"name": "DDNS"
|
||
},
|
||
"footer": {
|
||
"text": "DDNS #{ipv4Result}"
|
||
}
|
||
}
|
||
]
|
||
}
|
||
```
|
||
</details>
|
||
|
||
- [查看更多Webhook配置参考](https://github.com/jeessy2/ddns-go/issues/327)
|
||
|
||
## Callback
|
||
|
||
- 通过自定义回调可支持更多的第三方DNS服务商
|
||
- 配置的域名有几行, 就会回调几次
|
||
- 支持的变量
|
||
|
||
| 变量名 | 说明 |
|
||
| ---- | ---- |
|
||
| #{ip} | 新的IPv4/IPv6地址 |
|
||
| #{domain} | 当前域名 |
|
||
| #{recordType} | 记录类型 `A`或`AAAA` |
|
||
| #{ttl} | ttl |
|
||
- 如 RequestBody 为空则为 GET 请求,否则为 POST 请求
|
||
- [Callback配置参考](https://github.com/jeessy2/ddns-go/wiki/Callback配置参考)
|
||
|
||
## 界面
|
||
|
||

|
||
|
||
## 开发&自行编译
|
||
|
||
- 如果喜欢从源代码编译自己的版本,可以使用本项目提供的 Makefile 构建
|
||
- 使用 `make build` 生成本地编译后的 `ddns-go` 可执行文件
|
||
- 使用 `make build_docker_image` 自行编译 Docker 镜像
|